Hail Repair Shop Workflow: PDR Step-by-Step

A hail repair shop workflow is the fixed sequence a shop runs every vehicle through — intake and documentation, damage triage, glue-pull repair, and final inspection — paired with the tool and material choices that let a technician repeat that sequence dozens of times a day without rework. Paintless dent repair (PDR) is the professional method behind it: a group of techniques used to restore the shape of a qualifying exterior metal panel through controlled movement of the metal while keeping the existing factory or refinished paint intact, rather than removing and reapplying it. Hail damage is one of its most common applications, alongside door dings, creases, and minor collision dents, and in some cases a panel that can't be fully returned to shape paintlessly can still be pushed close enough to minimize body filler before repainting — a technique sometimes called "push to paint".
What Is a Hail Repair Shop Workflow (and How Does PDR Fix Hail Damage)?
A hail-damaged vehicle isn't one dent repeated a hundred times. It's a portfolio of damage where panel construction, dent count, size, depth, sharpness, coating condition, prior damage, and access all vary simultaneously across the same car. That's why repairability in a hail claim is decided through an eight-step priority system — OEM authorization and safety, part identity, finish viability, substrate condition, damage geometry, access, achievable quality target, and economic feasibility — with dent size evaluated only inside that framework, never on its own. A dent that looks identical to the one on the next panel over may not qualify for PDR at all once finish, access, and OEM rules for that specific panel are checked.
That's also why the estimate stage has to produce three distinct outputs, not one: a damage inventory of what's hit and where, a technical repairability call for each item, and a separate calculation of how the permitted operations price out in the shop's estimating system. Industry guidance from NAPDRT ties this to physical conditions, too — a hail estimate should be built on a vehicle that's been cleaned and brought indoors under proper PDR lighting, since sun glare and road grime hide and distort dent counts.
Shops that equip technicians with dependable cold-glue tab systems — a category Glexo builds specifically for this kind of repetitive, high-volume pulling — keep glue adhesion and pull control consistent from the first vehicle of the morning to the last one at dusk, which is what actually determines technician throughput during hail season, not how fast any single pull is executed.
Step-by-Step: From Vehicle Intake to Delivery
Regardless of whether a shop is a stand-alone PDR operation, a mobile unit, or a bay inside a dealership, every hail job runs through the same invariant technical core: identity check, safety triage, controlled inspection, OEM research, repairability determination, documented scope and authorization, repair and any required removal/installation (R&I), restoration and diagnostics, final quality control, and a delivery record. No phase gets skipped just because the delivery model changes. The business model can reorder who hands off what to whom, but it never changes the physics of the metal, the OEM limits on the vehicle, or the safety and QC steps required.
Vehicle Intake and Insurance/Estimate Documentation
Intake starts with matching the vehicle to its claim and recording pre-existing condition before anything is cleaned or touched. From there, every R&I line on the estimate needs to document the exact operation, its location, the reason for it, the procedure source, how the database treats it, labor and materials, safety implications like SRS, ADAS, or high-voltage (HV) systems, any sublet scope, and supporting evidence. This level of documentation is what keeps a hail estimate defensible when an insurer's adjuster reviews it later.
Triage and Damage Assessment
Triage is where the vehicle-level and panel-level decisions get made. Access is a recurring trap here: an access path that worked on one truck's bed or cab can't be assumed to work on a newer or older generation of the same model without re-verifying the panel construction. Before any trim, headliner, glass, seat, mirror, bumper, or module comes off to reach a dent, the technician has to check the OEM procedure, flag one-time-use parts, confirm whether SRS, ADAS, or HV systems are triggered, and get that operation added to the estimate and authorization first.
Repair Execution (Glue-Pull Technique in Practice)
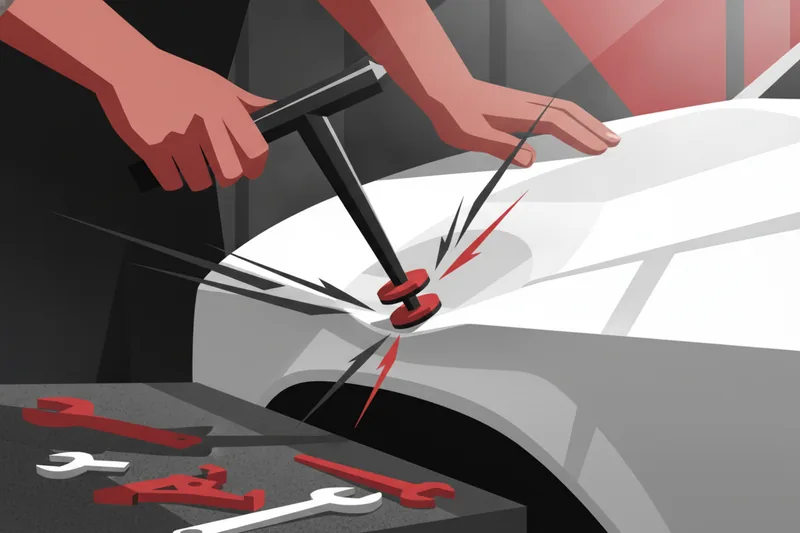
Once a dent is authorized, the standard sequence is: clean and prep the panel surface, apply glue to a tab sized to the dent, seat the tab on the dent center, and use a slide hammer or lifter to draw the metal back into shape while monitoring the surface for stress and pushmarks. Consistent surface prep and correctly matched glue are what keep this repeatable across a full day of pulls rather than working on the first few vehicles and degrading by the afternoon.
Quality Control and Final Inspection Before Delivery
A vehicle isn't done because the dent looks smaller under shop lighting. Release requires a confirmed, agreed contour, no new surface defects, no access holes left in the panel, a completed post-repair scan, DTCs that have been diagnosed rather than just cleared, successful calibrations, and no open SRS, ADAS, or HV concerns. Anywhere an R&I operation was performed to reach a dent, the technician also has to re-verify fit and panel gaps, seals and water barriers, electrical connections, and run a road or function test where the system requires one. Skipping this stage to push volume is how a hail shop turns a fast repair into a comeback.
Tools and Materials That Drive an Efficient Hail Repair Process
Hail decisions get made at three separate levels — the vehicle (scope and safety dependencies), the panel (repairability, count, access), and the individual dent (method and stop criteria) — and a vehicle-level conclusion is never just one dent's answer multiplied across the car. The damage map produced during triage needs to record dent counts and categories per panel, oversize or severe damage, panels needing conventional repair or replacement, R&I needs, and any glass, trim, or paint damage found along the way. That map is what tells a technician which tools and materials a given panel actually needs.
Cold Glue Tabs and Matching Glue to Ambient Temperature
Cold glue performance shifts with ambient temperature, which is why Glexo's cold glue is offered in variants matched to different working ranges — one formulated for use up to roughly 86°F/30°C and another for hotter conditions above that threshold. Picking the wrong variant for the day's temperature is a common source of tabs that release early or take too long to reach working tack, both of which cost a technician time on a job that should have been quick. For broader or larger dents that a single tab can't handle cleanly, the tool category widens to broad push, a beam or bridge puller, hot-melt or cold-glue combinations, or a lateral/hybrid approach, backed by good lighting, supports, and surface control to see what's actually happening under the pull.
Surface Prep for Reliable Adhesion (SPS Wipes)
Cold glue and hot-melt sticks both depend on a clean, contaminant-free surface to reach full tack. Glexo's SPS disposable wet wipes are built for the ultra-deep clean step before glue goes down, which matters most on older paint, waxed panels, or surfaces carrying a protective coating where a quick wipe with a shop rag leaves enough residue to weaken adhesion. On a high-volume hail job, a tab that lets go mid-pull because of a skipped prep step costs more time than the prep itself ever would.
Sonic Tips vs. Blending Hammers vs. Knockdown Tappers
These three tool families cover the metalworking side of the job once the glue-pull side is done or isn't the right approach for a given dent. Sonic tips are Glexo's line of soft and sharp interchangeable heads, shaped for reaching stretched metal from behind a panel where a slide hammer can't get a straight pull — soft heads for gentler pressure work, sharp spiked heads for more targeted contact. Blending hammers, available in multiple weights, are used to settle and smooth metal after the bulk of the dent has been pulled, with weight chosen to match how much correction is left without overworking the paint. Knockdown tappers, sized by tip diameter and often finished with a mirror polish, handle the fine detailing pass that removes the last small high or low spots before the panel goes to final inspection.
Scaling a Shop for Hail Season
Redundant Tab Kits and Reducing Downtime
The final dent count on any hail job has to be taken on a clean, dry panel — photos captured before cleaning are useful for documenting initial condition, but they don't establish the count a repair or an insurer's estimate is built on. That means triage can't be rushed just to free up a bay, and a shop moving several vehicles a day needs enough tab stock on hand that running out mid-job never forces a technician to wait on inventory instead of pulling. Slide hammers themselves aren't tied to one damage size — a hail shop typically keeps both standard and lighter, more precise variants on hand, since roughing work and fine correction pulls call for different control. Given that experienced hail-specialist technicians can earn $200,000–$400,000 in an active storm season, though that income is highly seasonal and unpredictable, the cost of carrying redundant tabs and tools is small next to the throughput a shop loses when a technician sits idle.
Ergonomic Tools and Reducing Technician Fatigue
A technician running twelve or more vehicles a day feels wrist and shoulder fatigue long before the shift ends, and fatigue is when pushmarks and missed dents start showing up in otherwise good work. Choosing blending hammer weight for the task rather than defaulting to one hammer all day, and keeping sonic tip selection matched to access and dent type instead of forcing the wrong tip into an awkward reach, reduces the physical strain that builds across a long hail-season shift.
Choosing the Right Equipment for Efficiency
Tool selection should never start with "which tool is already in the kit" or with picking a puller before the damage, finish, and access have been assessed — that's one of the most common errors shops make. Tools get chosen only after the repair plan is set; what's sitting on the bench should never be what decides the diagnosis. The governing order is: OEM and safety first, then the identified part and substrate, finish and coating, damage mechanics, access and nearby systems, the repair target, the method and control profile needed, then the specific tool, contact point, and interface — with raw efficiency considered only last, once everything above it is satisfied.
Inside that order, method selection itself follows the same logic — material, geometry, finish, access, construction, and OEM restrictions decide whether a job calls for glue-pull, a metal-shaping tool, or both. Sharp-contact precision work, the kind a sharp sonic tip or a fine knockdown tapper delivers, should only be used where the finish condition and required precision actually support it — it's not an automatic last step on every panel. And whenever a tool uses a screw-on or interchangeable tip, thread diameter and pitch, engagement length, the stop shoulder, permitted load, and clearance after assembly all need checking before it goes to work, so a tip doesn't loosen or fail mid-pull.
For a shop building out its hail-season equipment: match cold glue to the temperature range you'll actually be working in, keep tab stock deep enough to never interrupt a job, stock sonic tips in both soft and sharp profiles for the access problems hail throws at you, and keep at least two blending hammer weights and a couple of knockdown tapper sizes so the roughing-to-finishing progression doesn't stall on a missing tool.
Common Questions About Hail Repair Shop Workflows
How long does a typical hail repair take?
There's no fixed number — a technically feasible PDR repair can still be the wrong economic call when access or required R&I dominates the job, finish risk is high, reaching a full paintless result would take excessive time, or the panel's dent count exceeds the shop's efficient PDR threshold for that estimating context. A light hail panel with good access might take minutes per dent; a panel needing R&I and OEM checks first takes considerably longer, and a competent triage should flag that difference before the technician ever picks up a tool.
Do hail repair shops work directly with insurance?
Yes — most hail volume moves through insurance claims, and it's on the shop to keep damage categories separated on the estimate: hail-related damage, prior or unrelated damage, transport or storage damage, damage that happened during service, and any conventional repair, replacement, or glass work needed. Mixing these categories together is a documented source of estimating, insurance, and reputational problems.
Is mobile hail repair as effective as in-shop repair?
The delivery channel changes logistics, not the underlying repair. The business model — mobile, in-shop, or dealership-based — can change the order of administrative handoffs, but it doesn't change deformation physics, OEM limits, or the safety and QC steps a repair has to pass. What does need to travel with the vehicle regardless of location is the pre-cleaning documentation: overall condition, damaged panels, contamination, pre-existing damage, broken trim or glass, and the hail-damage pattern itself, recorded before cleaning so it's never mistaken for something the repair caused.
If your shop is heading into hail season and looking to tighten this workflow, explore Glexo's hail repair kits and temperature-matched cold glue systems to build a faster, more consistent process on the floor — and ask about regular-customer discounts for high-volume hail season orders.