How to Use a Slide Hammer for PDR | Glexo
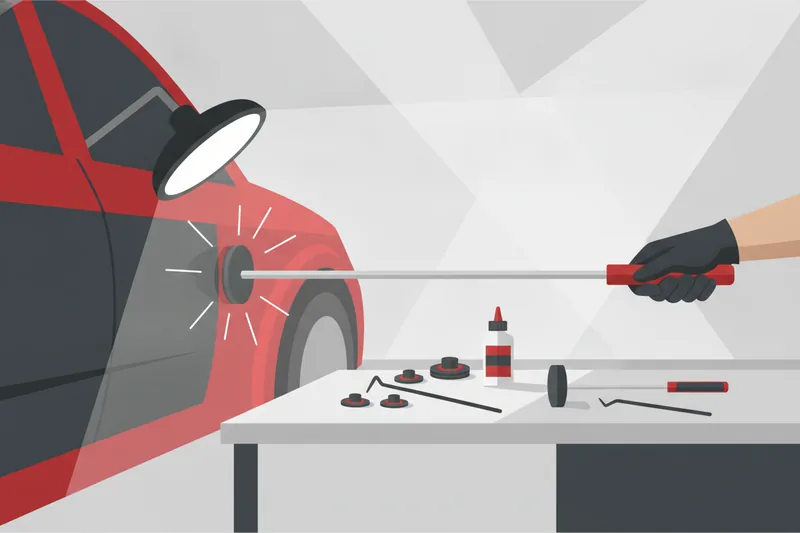
Ask a PDR technician what "slide hammer" means and you'll get a different answer than a mechanic pulling a wheel bearing. In paintless dent repair, a slide hammer is an inertial pulling tool — a weighted shaft that slides along a rod and strikes a stop, transferring a sharp outward impulse into whatever tab or tip is threaded onto the other end. Used correctly with a cold-glue tab system, it becomes a nondestructive pulling method that lifts a dent from the outside of the panel without touching the paint. This guide covers how the tool works, how to match tabs and threads correctly, and the exact cold-glue workflow for pulling a dent without leaving pushmarks or overpulling the metal.
What Is a Slide Hammer?
A slide hammer is a straight rod with a fixed stop at one end and a free-sliding weight in the middle. The technician threads an attachment — in PDR, typically a glue tab or a screw tip — onto the working end, then slams the weight back against the stop repeatedly. Each strike delivers a short, sharp pulling force along the axis of the rod.
Outside of PDR, the same mechanical concept shows up as a dent puller for automotive bodywork, or in a completely different form as a bearing/hub extraction tool. The confusion between those two worlds is exactly why most search results for this topic are wheel-bearing tutorials rather than panel repair instructions. In paintless dent repair (PDR) — a set of professional techniques that restore a panel's shape while keeping the factory paint finish intact — the slide hammer only earns its place in the workflow when it's paired with a PDR-specific attachment and process, not a mechanical extractor tip. Companies building dedicated PDR hardware, Glexo among them, design their tab systems and rods around this exact pulling motion, so the hammer's weight and rod length match the adhesive and tab it's meant to work with. Getting familiar with the slide hammer weight/rod you're holding — its mass, shaft length, and stop design — matters just as much as picking the right tab.
How Does a Slide Hammer Work?
The mechanism is simple but worth understanding before you touch a panel. The sliding weight travels a short distance along the shaft under your control, then strikes the fixed stop at the end nearest the attachment. That collision converts the weight's momentum into a brief, high-magnitude impact force, transmitted down the rod/shaft and into the tab or tip bonded to the dent.
This produces a fundamentally different load profile than a bridge or lever-style puller: a slide hammer delivers a high, short-duration impulse, while a bridge puller applies sustained tension over time. That distinction is why slide hammer technique is about repeated, metered strikes rather than one steady pull — each hit nudges the metal, and the technician reads the panel's response between strikes to build a controlled outward pull instead of yanking the dent out in one motion.
Types of Slide Hammers: Dent Puller vs. Bearing/Hub Puller
Not every slide hammer belongs in a PDR kit, and this is where most general-purpose content misleads technicians searching for panel repair help.
- Dent puller — a lightweight slide hammer built to thread onto a glue tab or screw tip. It's designed for controlled, incremental pulls on sheet metal, with a rod and weight sized for panel work rather than heavy mechanical extraction.
- Hub/bearing puller — a mechanical extraction tool, often paired with a three-jaw puller attachment that clamps around a hub, gear, or bearing race. These are built for high, sustained mechanical force to break a press-fit, not for the light, incremental pulls a painted panel can tolerate.
- Screw tip / welded stud tip — the connector that bridges a dent puller to the panel. A screw tip threads into the slide hammer rod on one side and into a compatible tab, stud, or adhesive fitting on the other, so the pulling force reaches the dented area directly.
The category itself isn't defined by one damage size — slide hammers show up in hail and roughing workflows on high-volume jobs, and lighter variants are used for smaller, more precise pulls, so don't assume "slide hammer" always means heavy-duty work. What matters is confirming you're holding a dent-puller configuration with a PDR-appropriate tip, not a bearing-puller frame with a jaw attachment.
Thread Sizes & Attachment Compatibility
This is the part generic tutorials skip entirely, and it's where technicians run into trouble. A slide hammer's rod ends in a threaded stud, and the screw tip / welded stud tip or tab you attach must match that thread — but there is no single thread standard shared across every PDR manufacturer's rods, tips, and tabs. A tab or tip built for one cold glue tab system will not necessarily thread onto a rod from a different brand, even if both are marketed for PDR use.
Practically, that means thread size compatibility should be checked in two directions before you start pulling:
- Confirm the tip or tab thread matches your slide hammer rod exactly — hand-tight and square, with no cross-threading.
- If you're mixing components from different suppliers (a rod from one line, tabs from another), verify compatibility with the manufacturer rather than assuming a universal fit.
The safest approach for shop reliability is running a matched slide hammer weight/rod, tip, and tab set from a single system, so thread pitch, tab size, and rod mass are all specified to work together rather than guessed at on the job.
How to Use a Slide Hammer for PDR Dent Removal (Cold Glue Tabs)
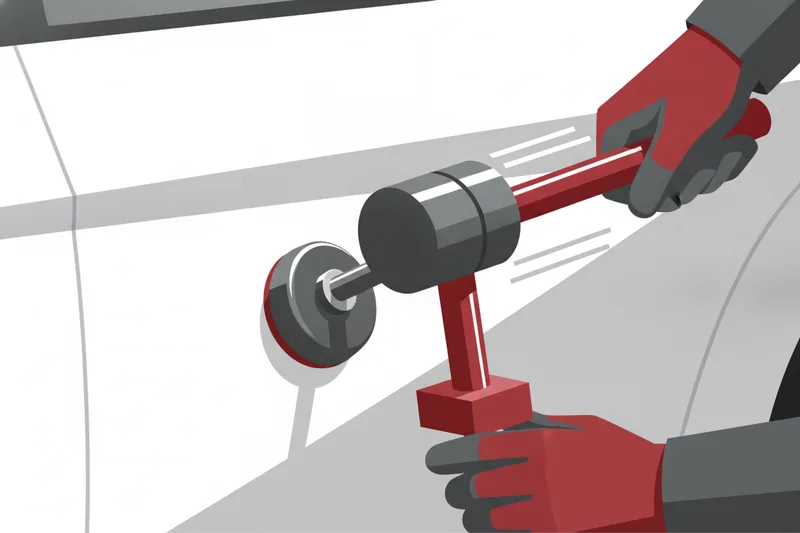
Cold glue pulling is the exterior PDR method built around this tool: a tab is bonded to the dent with a reusable adhesive compound, then a compatible pulling device — mini lifter or slide hammer — draws the metal back out from outside the panel. It's the method of choice when the back of the panel is blocked — double-skinned sections, sealed cant rails, internal bracing, or aluminum panels where rod access from behind isn't practical.
Step 1: Clean and Prep the Panel Surface
Adhesion fails before pulling ever starts if the surface is contaminated. Wipe the repair area with SPS surface-prep wipes to strip wax, sealant, and residue down to a clean paint surface — this step matters even more on older paint or panels with a protective coating, where a quick wipe with a shop rag leaves enough film behind to weaken the bond.
Step 2: Choose and Apply the Right Cold Glue for Ambient Temperature
Cold glue behaves differently depending on shop or outdoor temperature. Match the glue to the working range — a formulation suited up to roughly 86°F/30°C behaves differently than one designed for hotter conditions — and apply it evenly across the tab face. Getting this wrong shows up immediately as weak tack or a tab that releases mid-pull.
Step 3: Attach the Tab and Thread the Slide Hammer
Center the tab over the deepest point of the dent and hold it under light pressure until the glue sets enough to carry load. Thread the slide hammer's rod into the tab's stud or fitting, checking that the connection is square and fully seated — a partially threaded tab is the most common cause of a stripped fitting mid-pull.
Step 4: Pull the Dent with Controlled Strikes
Slide the weight back a short, consistent distance and strike the stop in a steady rhythm rather than full-force swings. Because a slide hammer delivers a high, short impulse rather than the sustained, metered tension of a mini lifter, it carries more risk of overpull if you strike too hard or too often without checking progress. Pull in short bursts, then stop and read the panel.
Step 5: Check Panel Shape and Remove Residual Glue
Sight down the panel under a reflective light between pulls to track how close you are to the original contour. Once the shape is restored, remove the tab and clean off the remaining glue — most cold glue compounds are designed to be reusable across multiple pulls as long as the tab and adhesive are still in good condition.
Safety Tips & Common Mistakes
Most slide hammer problems in PDR trace back to a handful of repeatable errors:
- Pushmarks from overpulling — because the tool delivers a sharp impulse rather than gradual tension, it's easy to pull past the panel's original contour if you don't pause to check shape between strikes.
- Incorrect glue temperature match — using a cold glue rated for the wrong ambient range gives inconsistent tack, which either drops the tab mid-pull or transfers force unevenly and stretches the panel.
- Wrong tab size for the dent — an undersized tab concentrates force on too small an area and risks a sharp crease instead of a smooth pull; oversized tabs waste adhesive and can miss the dent's true center.
- Wrist and hand strain — repeated slide hammer strikes load the wrist joint directly. Keep strikes short and let the weight do the work rather than forcing the swing, and switch to a lighter rod for fine work instead of muscling a heavy one.
- Skipping surface prep — a rushed clean before applying the tab is the single most avoidable cause of adhesion failure mid-pull.
Paintless dent repair only works cleanly on a panel with intact paint and metal that hasn't stretched beyond its original form — a re-painted panel or already-stretched metal reduces how reliably any pulling method, slide hammer included, restores the original shape.
FAQ
What thread is on a slide hammer? There's no universal thread standard across PDR manufacturers. The rod ends in a threaded stud sized to that brand's tips and tabs, so compatibility has to be verified against the specific system rather than assumed — running matched rod, tip, and tab components from one line avoids cross-thread guesswork.
How do I choose the right slide hammer weight? Weight selection depends on the job, not a fixed rule. Heavier slide hammers see more use in hail and roughing work where volume matters, while lighter variants give more control for smaller, precision pulls — match the rod's mass to the size and delicacy of the dent, not the other way around.
Should I use cold glue or hot glue for slide hammer pulling? Both are exterior PDR methods, but they behave differently. Cold glue uses a reusable, tacky compound on the tab and suits repeated pulls, hail workflows, and jobs where reusing the same tab across many dents saves time. Hot glue bonds the tab to the panel with a melted adhesive applied through a glue gun, giving a firm, single-use bond suited to specific pull types. Choose based on job volume and whether tab reuse matters for your workflow.
Pulling a dent cleanly with a slide hammer comes down to matching the right tab, glue, and thread to the job — not just swinging the weight harder. Explore Glexo's cold glue tab systems and compatible slide hammer accessories to build a complete, professional dent-pulling kit.