PDR Slide Hammer Glue Kit: How It Works
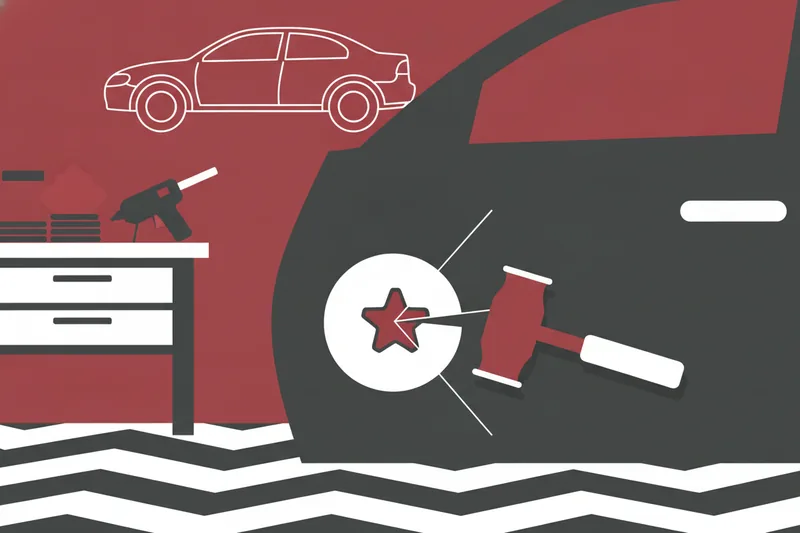
A PDR slide hammer glue kit is the exterior dent-pulling system technicians turn to when a panel's backside is sealed, braced, or otherwise unreachable — think cant rails, double-skinned doors, or structural sections where rods and pushing tools simply can't get in. Instead of pushing the metal back from behind, the technician bonds a plastic tab to the outside of the dent with adhesive, connects that tab to a sliding-weight puller, and delivers a controlled outward pull until the metal returns to shape. This guide breaks down the chemistry, hardware, and technique decisions — glue type, tab shape, hammer weight, cure time — that separate a clean pull from a wasted tab and a pushmark.
What Is a PDR Slide Hammer Glue Kit?
A typical kit bundles four things: an adhesive (cold glue or a PDR hot-melt stick), a glue gun if hot melt is used, a range of pulling tabs, and a slide hammer or lifter to apply force. The slide hammer itself is an inertial pulling device — a sliding weight travels along a shaft and strikes a stop plate, transferring a short, sharp impulse rather than a steady pull. That distinguishes it from a mini lifter or bridge puller, which apply sustained, metered tension instead of a single jolt. A slide hammer only counts as a PDR tool when it's paired with a nondestructive, PDR-compatible tab-and-adhesive process — bolted onto a random adapter, it's just an inertial puller.
Core components: hammer, glue, tabs
The glue tab is the load path between adhesive and hammer, not a suction cup — it generates no pulling force on its own. Every tab has four functional zones: a contact face that meets the adhesive, a body whose stiffness or flex determines how the pull feels, a neck that carries the load, and an adapter interface that connects to the puller. Glexo builds its cold-glue tabs around that same chain, sizing tab necks to standard adapters so a technician isn't hunting for a converter mid-job. When everything lines up — adhesive to tab, tab to panel, tab neck to adapter, adapter to hammer — pulling force transfers cleanly instead of dissipating into flex or slippage.
Cold Glue vs Hot Glue for PDR
Cold glue and hot melt solve the same problem — bonding a tab to sheet metal — with different chemistry and different jobs. Cold glue is a ready-to-use, tacky, viscoelastic compound applied straight to the tab; it isn't a two-part adhesive and it isn't cured with heat. It's also not a generic cartridge-and-gun system — no glue gun required. After a pull, the compound is typically peeled off and reused, provided it's still in usable condition.
Hot glue, by contrast, is melted through a glue gun and applied to the tab while liquid; it bonds as it cools, then releases with heat or a solvent for cleanup. It delivers rock-solid adhesion and can generate serious pulling force, which is why it isn't a "weaker" option — it's simply built for different geometry.
Why ambient temperature changes glue choice
Cold glue's tack and stiffness shift with ambient temperature, which is why manufacturers often offer cold-glue variants rated for different temperature ranges, though the exact ranges vary by product and vendor rather than following a single industry standard. Picking the wrong variant for the day's temperature is a common cause of a tab that slips mid-pull rather than releasing cleanly.
Can you use regular hot glue for PDR?
No — a generic craft hot-melt stick isn't formulated for the bond strength or clean release a pull demands; PDR hot-melt adhesive is a purpose-built compound matched to a compatible tab and gun. Cold glue tends to suit large, shallow dents, heavy hail damage, and crown work, while hot glue's pinpoint grip is better suited to deep, small dents where cold glue can't get sharp enough purchase.
How to Choose the Right Slide Hammer Weight
Slide hammer weight governs how much impulse reaches the panel per strike, and manufacturers build well beyond the old "2 lb or 3 lb" assumption — 40-ounce (2.5 lb) and heavier models exist specifically for higher-mass pulls. Heavier hammers suit hail and roughing work, where the goal is broad initial movement across many shallow dents; lighter, smaller hammers suit precision pulls where control matters more than mass. Panel thickness and dent severity should drive the choice, not habit — an oversized hammer on a light aluminum panel risks an overpull, since the impulse profile of a slide hammer already carries less built-in control than a lever-style lifter. Ergonomically, a lighter hammer reduces wrist fatigue across a full day of hail volume, but only if it still has enough mass to move the dent in a reasonable number of strikes — a hammer that's too light just means more repeated impulses per tab.
Best Glue Tabs for Different Dent Sizes and Locations
Tab shapes exist because dent geometry varies — a broad, flat tab spreads load across a shallow crease, while a smaller round or oval tab concentrates pull on a tight, deep dent. Tab selection also tracks repair volume: general repair tabs cover routine single-dent jobs, micro kits carry smaller tabs for pinpoint dents and detail work, and hail kits carry higher counts of tabs in common sizes so a technician isn't re-cleaning and re-gluing the same tab dozens of times a day. Redundant tabs in a hail kit exist for exactly that throughput reason — cold glue's reusability helps, but having spares on hand keeps a pull sequence moving instead of pausing for cleanup between every dent.
Surface Prep for Reliable Glue Adhesion
Glue adhesion fails more often from a dirty panel than a bad tab. Surface prep covers three distinct jobs — cleaning the finish, promoting adhesion, and later releasing the tab — and a single wipe product may combine more than one of those roles. SPS surface-prep wipes are built for the first job: stripping wax, road film, and light residue from the paint before the tab ever touches it, which matters most on older paint or panels carrying a protective layer.
Extra caution is warranted on unknown refinish work, filler-repaired areas, cracked or delaminated clearcoat, matte or satin finishes, ceramic coatings, PPF, wraps, decals, or exposed corrosion — all of these change how reliably glue grips or how the panel responds to a pull. A ceramic coating in particular can reduce tab adhesion, and where that's suspected, removing it per the coating manufacturer's instructions first is the safer path. On a previously repainted panel, hidden filler changes how the metal reacts to a pull and raises the stakes if the pull goes wrong — that's a case for a slower, more deliberate approach rather than a fast hail-speed sequence. An anti-adhesive film has its place here too: applied around the work area, it protects adjacent trim or finish from stray adhesive during a busy sequence of pulls.
Step-by-Step: Using a PDR Slide Hammer Glue Kit
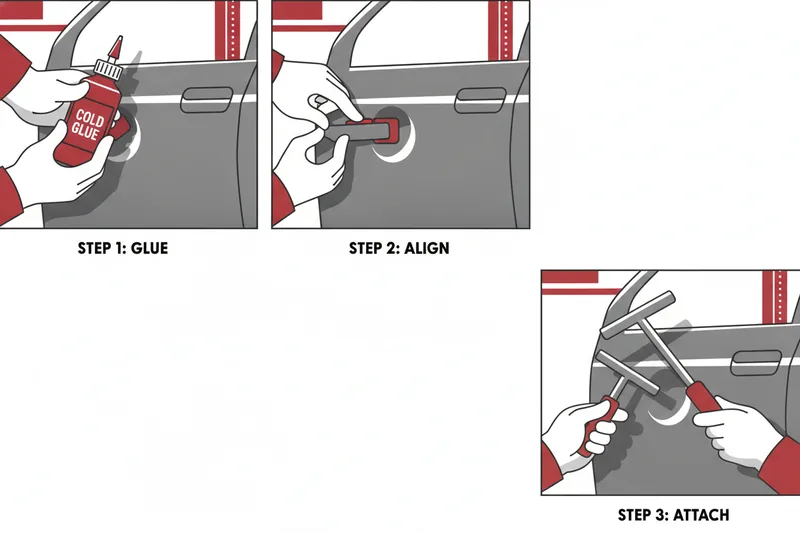
- Clean the panel. Wipe the repair area and a margin around it with an SPS-type prep wipe to remove wax, dust, and film.
- Match glue to conditions. Choose the cold-glue or hot-melt formulation rated for the shop's current ambient temperature.
- Apply glue to the tab, working it evenly across the tab's contact face rather than piling it in the center.
- Twist the tab onto the dent center, seating it firmly so the adhesive contacts the full face without trapped air.
- Attach the slide hammer to the tab's adapter interface and confirm the connection is snug — a loose adapter wastes the pull's force before it reaches the panel.
- Pull in line with the dent's low point. An off-axis pull can displace metal in the wrong direction or disturb an adjacent area instead of resolving the center.
- Work outward from the center on larger dents, moving to secondary tab placements to avoid a single overloaded pull that risks a pushmark.
Pushmarks most often come from pulling too hard, too fast, or off-axis — not from the tool itself.
How Long to Let PDR Glue Dry Before Pulling
Cure time depends on both the adhesive and the shop's ambient temperature — hot glue needs to cool and set after gunning, and cold glue needs its tack to build before it can carry a full impulse load. Rushing a pull before the adhesive has properly grabbed is one of the most common causes of a failed pull: the tab releases mid-strike, the impulse is wasted, and the technician is back to cleaning and re-gluing instead of moving on. If a pull consistently fails to grip, check three things before blaming the tool: whether the glue formulation matches the shop's temperature, whether the panel was fully clean before gluing, and whether the tab size was appropriate for the dent's contact area. A premature pull that does grip but slips partway through is a frequent, underrated cause of pushmarks, since the sudden loss of controlled tension can leave a secondary mark near the original dent.
Choosing a Slide Hammer Glue Kit for Your Shop
The right kit configuration follows job volume, not tool preference. A shop running frequent hail work benefits from a hail kit: higher tab counts in common sizes, a hammer weight suited to broad initial movement, and glue variants rated for whatever season the crew is working in. A shop doing mixed panel and crease repair is better served by a general repair kit — a smaller, varied tab set and a mid-weight hammer that handles most dent sizes without swapping hardware constantly. Detail-focused technicians doing pinpoint pulls on tight dents lean on micro kits, which trade hammer mass and tab size for control.
Before adding a kit, run through a short checklist: glue type matched to your shop's typical temperature range, tab sizes that cover your most common dent geometry, a hammer weight appropriate to your panel mix, and prep wipes on hand for contaminated or coated surfaces. Getting this combination right the first time avoids buying a kit that's mismatched to the work you actually do.
FAQ
Can I use regular hot glue for PDR? No. Generic craft hot-melt isn't formulated for the bond strength or clean release a pull requires — PDR hot-melt adhesive and a compatible glue gun and tab are matched as a system.
How long does PDR glue take to dry? It varies by adhesive type and ambient temperature; cold glue needs its tack to build before it can carry a pull, and hot glue needs to cool fully after gunning. Check the specific product's guidance rather than assuming a fixed time.
What size slide hammer weight do I need? Match weight to the job: heavier hammers suit hail and roughing work where broad movement matters, while lighter hammers suit precision pulls on smaller, more delicate dents.
Are glue tabs reusable? The tabs themselves generally can be reused across pulls if undamaged. Cold glue is typically peelable and reusable as long as it's still in good condition; hot glue is designed to release and be cleaned off rather than reused in the same way.
Glexo's cold-glue slide hammer kits, tabs, and SPS surface-prep wipes are built around this same pull chain — matched glue-to-tab-to-adapter compatibility, hail kits with redundant tabs, and worldwide shipping with discounts for regular shop customers. Browse the lineup to put together the kit configuration that fits your shop's actual job mix.