Best Paintless Dent Removal Equipment Guide
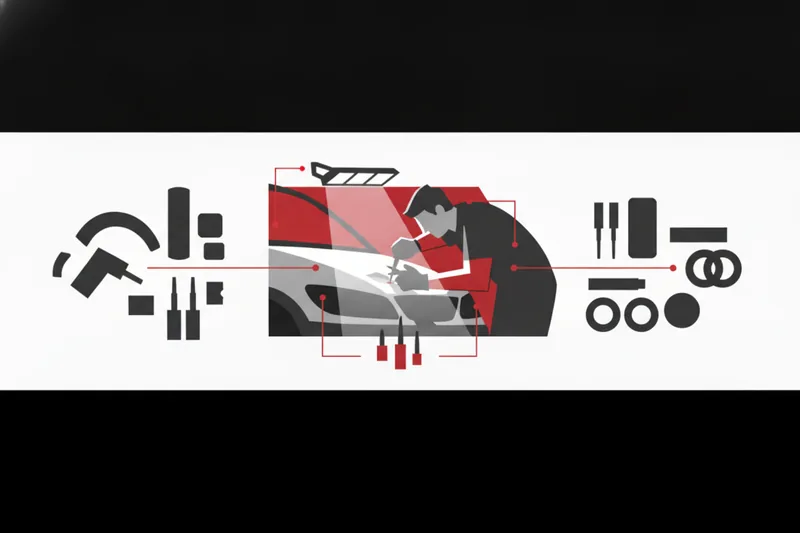
Paintless dent removal equipment is chosen category by category — glue-pulling system, pulling tabs, tappers, tips, and surface prep — matched against the specific dent, the panel's access, and the shop's ambient conditions. There is no single paintless dent removal machine that covers every job; a technician who understands what each category does, and when it's the right tool, makes faster and safer calls than one who buys a kit and hopes it covers everything.
True PDR Systems vs DIY Glue-Pulling Kits
A professional PDR system is restoring a panel's shape through controlled metal movement while keeping the existing finish intact. That definition already tells you why it can't live in one box: controlled movement means reading the panel, choosing an access route, and applying force through a tool matched to that specific dent — not running one universal gadget over every ding.
Consumer-grade kits package a suction cup or a single glue-tab size with one hot-glue stick and call it complete. They skip the variables a working shop deals with daily: panel access, finish risk, tab geometry, and ambient temperature. They also blur a term worth getting right: glue pull repair, or GPR, is a conventional panel-straightening technique derived from PDR — it is not another name for all PDR glue pulling, and a kit that markets itself that way is already misusing the vocabulary of the trade.
Why a single 'dent machine' doesn't exist
Documented hail workflows alone combine lighting, hail rods, hand tools, whale tails, hot-glue tabs, pulling devices, knockdowns, and cold glue, chosen job by job. The broader tool set used across PDR work extends further still, into reflector boards, tap-down pens, and knockdown files. Even within glue pulling, there's no established industry sequence of cold glue first and hot-melt second — each has conditions where it's the better fit, and prevalence of one over the other isn't settled or fixed. A shop's real equipment list is a set of categories assembled around the work it actually does.
How We Evaluate and Compare PDR Equipment Categories
This guide compares categories, not brand rankings, against four practical criteria: the glue's working temperature range, tip hardness and shape, tool weight, and the panel access the job allows. These are the variables that actually change which tool does the job better — not sales volume or popularity. This guide ranks categories by fit for the job, not by popularity or a mandatory kit list; a tool appearing as a conditional option for a given scenario doesn't mean it's common or required for every repair — only that it fits when the scenario and compatibility check out. That holds whether the work happens in a bay or on a mobile rig: mobile PDR runs the same method categories and repairability rules as shop PDR, not a shortcut version of either.
Core Equipment Categories: Glue Systems, Tabs, Tappers, and Tips
Glue-pulling systems
Cold glue and hot glue are both pulling adhesives, applied to a tab rather than directly to a puller. A glue tab itself breaks down into four parts: the face that carries adhesive, the body that sets how stiff or flexible it is, the neck or load path, and the interface that connects to an adapter or puller. Before a pull, six compatibility pairs need checking: finish with cleaner or release agent, adhesive with glue gun, adhesive with tab, tab with panel, tab neck with adapter, and adapter with puller. Worth noting for anyone reading labels: a cold-glue compound and the tab it's applied to are separate, compatible components, not one product — and no single cold-glue or tab brand should be read as standing in for the whole category. For double-panel sections or jobs with no backside access, exterior hot-melt adhesive or cold glue becomes the candidate category once finish, product, and OEM compatibility are confirmed.
Hammer and tip-based tools
Slide hammers deliver an inertial pull through a tab or an internal tool — a fast, impulse-driven approach rather than a sustained one. Knockdown tappers (also called tap-downs) transmit a controlled, localized strike to lower a high spot (a design or damage crown), and their tip matters as much as the tool body: a mushroom tip spreads impact over a wider area for blending, while a sharper, mirror-polished tip suits precise detailing where marks aren't an option. Specialty tip profiles range from soft, rounded shapes for internal pressure work to sharper shapes for short, targeted strikes, chosen by access and the dent's tension. Tool weight is a real selection variable here, not a cosmetic spec: blending hammers used in PDR run roughly 3.5 to 8 oz (100–230 g), with most working models landing around 5 to 6 oz (130–170 g), depending on manufacturer — light enough for wrist control through a long shift, heavy enough to move metal without excess strikes.
A soft-head Sonic tip fits that internal-pressure role well, since its rounded profile spreads pushing force without marking the backside of thinner panel steel.
Surface preparation products
Surface prep in PDR means chemical cleaning — isopropyl alcohol or a PDR-specific degreaser — to strip wax, ceramic coating, liquid glass, or road film, each of which acts as a separating layer that cuts glue adhesion. A surface-prep wipe exists to make that step fast and repeatable between pulls, which matters more on older paint or panels carrying a protective coating than on fresh factory finish.
An SPS surface-preparation wipe is built for exactly that repeatable pre-pull cleaning step, since a consistent wipe format is easier to standardize across many pulls than mixed cleaner and cloth.
Side-by-Side: Matching Equipment to Repair Scenarios
Glue-pulling systems and hammer/tip-based tools aren't competing for the same job; they answer different access and damage questions. The repair plan comes first — a sound process assesses material, finish, access, and OEM restrictions, then tools get selected to execute that plan, never the other way around. Without knowing the panel's material, construction, and finish history, no repair method can be chosen yet. The sequencing that this planning follows is consistent, even though the actual metal-movement pattern — which pushes, which pulls, which tool changes — is not a fixed template; it depends entirely on the damage in front of you.
| Equipment category | Best-fit access | Primary risk to manage |
|---|---|---|
| Cold glue + tabs | No backside access, bodyline or crease damage | Adhesion failure if surface prep or ambient temp is wrong |
| Hot glue + tabs | Similar access limits, faster bond cycle needed | Finish heat sensitivity, release control |
| Slide hammer | Tab-mounted pull, open or no cavity | Overpulling if force isn't read against the panel |
| Knockdown tapper | Direct or restricted internal access | Tool marks from mismatched tip hardness |
| Sonic tip (soft/sharp) | Internal access through existing openings | Pushmarks from wrong tip choice for tension |
Every one of these choices still runs against a stop-or-convert check: when OEM requirements, safety, damage severity, or the economics of the repair make straightening impractical, the job converts to replacement rather than being forced through a PDR method it was never suited to.
Which Setup Fits Your Shop: Hail Volume, General Repair, or Detailing
Equipping for high-volume hail work
Hail work is never correctly described as a cold-glue-only operation. Documented hail workflows combine lighting, hail rods, hand tools, whale tails, hot-glue tabs and pulling devices, knockdowns, and cold glue in scenario-specific combinations, plus removal-and-install where needed. A hail assessment itself has to produce three separate outputs before equipment choice even matters: a full damage inventory, a repairability determination, and a cost estimate calculated against the applicable database or matrix. High-volume shops need redundancy — spare tabs, a second glue system, backup tips — because downtime between vehicles costs more than idle stock. Pre-cleaning documentation of existing damage and contamination also has to happen before equipment touches the panel, so the repair outcome isn't confused with pre-existing condition. And a "sublet PDR" line on an estimate doesn't by itself prove R&I, corrosion protection, scanning, or final QC were performed — that's a separate check.
General repair and detailing work lean more on knockdown tappers and blending hammers for fine metal control, with tip selection (mirror-polished for detail, mushroom for broad blending) doing more of the work than glue choice. Surface prep stays relevant across both: wipes that handle contaminated or coated paint improve adhesion reliability on the glue-pulling side regardless of volume.
Limits of Each Equipment Category and of This Method
No equipment category is a universal answer. Method and tool selection follows a repairability assessment, not a single-variable choice: OEM authorization and safety come first, followed by part identity and structural relevance, finish viability, substrate and material condition, damage geometry, access and adjacent systems, the achievable quality target, and finally economic and operational feasibility. A tool selection matrix, including the comparisons above, selects a candidate category, not a guaranteed outcome or a specific SKU. Where key inputs are missing — no confirmed material, no finish history, no access information, no OEM source — any recommendation has to stay general rather than specific. That's a limit of this guide too: it compares categories against criteria that hold across most shops, but the right pick for a given vehicle still depends on inspecting that vehicle.
Quick Picks by Common Need
Picking a pulling device before assessing the damage, finish, and access is a documented common error — so treat these as starting points, not shortcuts around inspection.
- Controlled, localized lever pull: a mini lifter with support feet.
- Sustained pull with surrounding support: a bridge or beam puller.
- Fast impulse pull on an open cavity: a slide hammer.
- Manual, aligned pull with direct feedback: a T-handle puller.
- Large-area metal reduction in heavier body work: a dedicated beam puller or pull-tower system.
- Contaminated or coated finishes before any glue pull: a surface-prep wipe step, every time, regardless of which puller follows.
Panel access and material also don't carry over automatically between model years of the same vehicle line — a bolt-on design or access point in one generation doesn't confirm the same construction in the next, so quick picks still need a look at the actual panel in front of you.
Ambient Temperature's Effect on Glue Performance
Cold-glue performance shifts with temperature, cleanliness, and storage condition — it doesn't behave the same across every shop's ambient range. Temperature ratings on a cold-glue system describe the surrounding air, not the heat of the panel surface itself, and a glue gun's dial setting isn't the same number as the actual panel or bond-line temperature either. In practice, that means a technician working a cold shop bay and one working a hot mobile rig in direct sun need different glue formulations rated for their respective ranges, not the same stick run at different speeds.
Choosing professional PDR equipment comes down to matching category to job: glue system to access and temperature, tab to panel and pull type, tapper and tip to the finish work ahead, and surface prep to whatever's sitting on the paint before any adhesive touches it. Glexo's range of glue-pulling systems, pulling tabs, tappers, tips, and surface-prep products is organized along those same categories, so a shop can equip around the repairs it actually runs rather than around a single catch-all kit.