How to Repair Auto Hail Damage: PDR Process
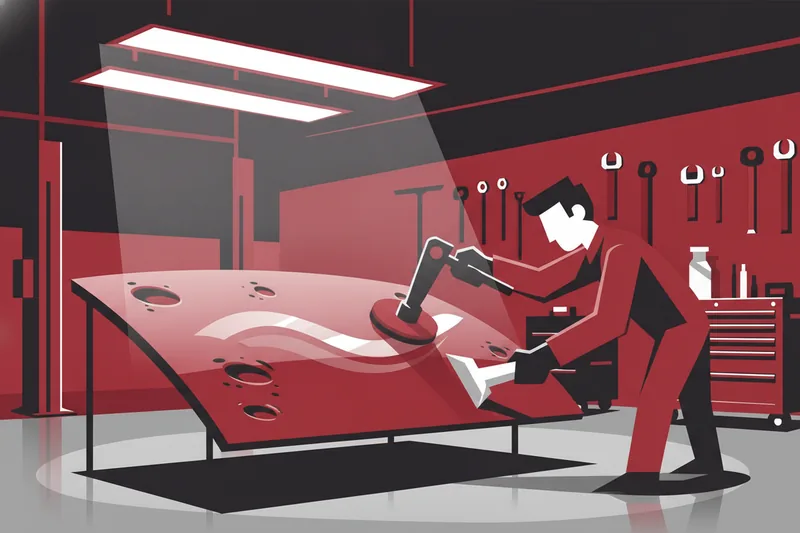
A finished hail repair follows the same sequence every time: inspect and decontaminate the panel, pick a cold glue grade that matches the shop's current ambient temperature, bond a tab over the dent and pull it with a slide hammer, then refine the surface with sonic tips and knockdown or blending tools. Skip the cleaning step, or guess at the glue grade instead of matching it to the bay's temperature, and the usual result is a failed pull, a lifted edge of clear coat, or a pushmark — the faint ring of stress a panel shows when it has been pulled harder or faster than the metal and finish can absorb. What follows is that sequence in the order a working PDR technician actually runs it.
What a Correctly Repaired Hail Panel Looks Like
A finished repair restores the panel's original contour — the factory curve a reflection board confirms — without a pushmark, a lifted clear coat edge, or a soft spot from overpulled metal. Paint integrity matters as much as shape: check the finish for new cracking, color shift, or texture change the pull itself may have caused, not just whether the dent is gone.
Not every hail dent gets there. A hail-damaged vehicle is rarely one dent repeated many times; it's a portfolio of damage where panel material, depth, sharpness, body-line location, and coating condition all vary across the same car. Repairability has to be judged panel by panel against the damage group, finish, access, and applicable OEM rules, not assumed from the outside. Treating every dent in a batch as automatically repairable is how pushmarks and wasted pulls get built into the job before a tool is even picked up.
Tools and Consumables to Have Ready Before You Start
Tool selection starts from the repair plan, not from whatever is already open in the case — the panel, the damage, and the access route decide what belongs on the bench. Before starting, a technician needs working reflection and lighting to read the surface, a clear read on the damage and finish, and a safe way to support and access the panel from behind if needed.
With that plan set, the core kit for cold-glue hail work covers:
- A cold glue system graded for the shop's ambient temperature.
- Glue tabs in several shapes and stiffnesses, since tab geometry changes how force spreads across the dent.
- A slide hammer, the inertial pulling device that applies force once the tab is seated.
- Sonic tips — interchangeable soft and sharp tips fitted to an internal tool for dents worked from behind the panel.
- Blending and knockdown tools to settle remaining highs and lows after the pull.
- Surface-prep wipes or a PDR-specific degreaser to strip wax, sealant, and road film before glue touches the panel.
A surface-control tool is only as good as its condition: the tip needs to be clean and undamaged, matched to a compatible striking tool, and checked against the finish and temperature before use. On shops running mixed steel and aluminum work, keep tooling separated where the process requires it — cross-contamination between the two metals is a real risk, not a formality.
Prepping and Decontaminating the Panel for Adhesion
Most adhesion failures trace back to this step, not to the glue itself. A panel is ready for glue when it's clean, dry, and squeaks under a finger — if it doesn't squeak, a film of wax, sealant, or road grime is still sitting between the paint and the compound. Surface-prep wipes or an isopropyl-based PDR degreaser remove that layer; a quick pass with a shop rag isn't the same step.
Some finishes need extra caution before glue touches them at all: an unknown refinish, a coating with filler underneath, cracking or delamination, a matte or satin clear, a ceramic coating or sealant, paint protection film or a wrap, or exposed substrate and corrosion all change how, or whether, the compound holds. A panel that's been refinished at some point has unknown adhesion and flexibility and may hide filler under the top coat, so there's no safe assumption it behaves like factory paint.
Warming a cold glue system to bring it into working condition is normal handling, not license to heat the panel itself. And if tabs are stored under anti-adhesion film between jobs, that film is a storage accessory only — it never goes between the compound and the panel during an actual pull.
Matching Cold Glue to Ambient Temperature
Cold glue isn't one product that behaves the same way in every bay. Pull performance changes with temperature, cleanliness, and storage condition, so the same compound can feel right in one shop and sluggish or over-tacky in another. The rating on a cold glue product describes the ambient air the technician is working in, not the temperature of the panel surface itself, which can run hotter or colder depending on sun exposure and material.
In practice, that means keeping more than one glue grade on hand: one formulation for cooler shop conditions and a separate warmer-weather formulation for hot summer bays. Each product line sets its own crossover point on its own data sheet, so the right move is checking that sheet rather than assuming one number applies across every brand.
Temperature isn't the only variable. Pull dynamics, the panel's metal, and the panel's own temperature factor in alongside ambient air: a rigid, brittle glue suits a sharp, shock-style pull, while a more elastic compound suits a slow, sustained one. Tab choice follows the same logic — stiffer tabs concentrate force for a shock pull, more flexible tabs spread it for a sustained pull. Picking the wrong grade for the day's conditions is one of the more common reasons a tab lets go mid-pull instead of lifting the dent, so this decision belongs at the start of the job.
The Cold-Glue Tab Pull Sequence, Step by Step
With the panel clean and the glue grade chosen, the pull itself runs in a fixed order:
- Inspect and clean the panel. Confirm it squeaks under a finger and flag any refinished or coated area for extra caution. Result: a panel ready to take glue reliably.
- Select the cold glue grade for the bay's ambient temperature, checking the data sheet rather than going by feel. Result: a compound viscosity matched to current conditions.
- Apply glue evenly across the tab face. Pull response depends on tab area, shape, and stiffness together with how evenly the compound is spread. Result: a tab with full, even contact for a strong bond.
- Center and seat the tab over the dent's low point with firm, even pressure. Result: a tab bonded and aligned over the deepest part of the damage.
- Attach the slide hammer and pull in controlled, incremental strokes. Force travels from the slide hammer through the tab adapter, through the glue, through the paint, and into the panel, so each link has to hold. Result: the dent rises back toward the panel's original line.
- Release and clean the tab from the panel. A clean release from an otherwise good pull is a different problem than a bond that failed at the paint or inside the compound — the three are distinct failure modes with different fixes. Result: a panel surface free of glue residue.
- Refine remaining high or low spots with sonic tips from behind and a knockdown or blending tool from the front. Result: a panel blended smooth into the surrounding contour.
Worked example: a technician is working a batch of hail-damaged hoods in a bay holding at 65°F (18°C). One hood has a shallow, roughly 1-inch round dent with no sharpness or cracking nearby. The panel wipes clean and squeaks on the first pass, so no extra decontamination is needed. With the bay well under the warmer-weather crossover point, the technician uses the cooler-conditions glue grade on a medium round tab sized to the dent, seats it over the low point, and pulls in short, controlled strokes with the slide hammer. The metal returns to the surrounding line on the second pull. The tab releases cleanly, residue wipes off with the surface-prep wipe already on hand, and a few passes with a sonic tip from behind and a knockdown tool from the front settle the last micro-low. The panel reads flat under the shop light, with no pushmark and no change in the clear coat.
Checking That the Repair Actually Holds
Check the result under the same kind of controlled light used to read the damage — a flat ceiling light won't show a pushmark or a remaining low the way a reflection board will. Run a hand across the repair and the surrounding metal: the contour should read as one continuous surface, with no ridge or soft spot where the tab sat.
Look specifically for a pushmark at the repair's perimeter, and for new cracking, color shift, or texture change in the paint that wasn't there before the pull. Either one means the job isn't finished, even if the dent itself is gone.
If a stage of the pull held the metal under tension to get it into position, release or revise that tension before calling it done — a shape that's only holding because it's still under pull isn't the finished result. On a panel that needed removal and reinstallation for access, close out by confirming fit, gaps, seals, and any affected electrical function before moving to the next panel.
Troubleshooting Failed Pulls, Pushmarks, and Adhesion Problems
The most common cause of a failed pull or a pushmark is a mismatch between glue grade and ambient temperature, or a surface that wasn't actually clean when the tab went on — rule out both before blaming technique. If a tab releases but the dent hasn't moved and the surface underneath is clean, suspect the glue-to-temperature match before anything else.
When a pull fails, diagnose which link let go before repeating it: a fracture inside the compound, a release from the tab, and a release from the finish are three different failure modes, and repeating the pull blind usually repeats the result. A tab that picked up release agent or residue from a previous pull can compromise the next bond, so a tab coming out of storage film needs a fresh wipe, not just a look.
For adhesion problems specifically, work back through three separate functions that can each be the weak link, even when one product performs more than one of them: surface cleaning, adhesion promotion, and release or removal of old compound. Before the next pull, check compatibility down the chain — finish to cleaner, adhesive to tab, tab to panel, tab neck to adapter and puller — since a mismatch at any point shows up as a weak or unpredictable pull.
Stop the pull rather than push through it if the finish changes, adhesion turns unpredictable, new damage appears, too much surrounding metal is moving, or the glue simply isn't behaving the way its data sheet describes for the current temperature.
Consistent results across a hail batch come down to having the right category of tool for each stage — temperature-matched glue, tabs sized to the dent, a dependable slide hammer, and sonic and knockdown tools for finishing — rather than improvising with whatever's open on the cart. Glexo's range of PDR tools and consumables covers each of those categories for shops building out a reliable hail repair workflow.