Cold Glue Dent Puller: How It Works & How to Use
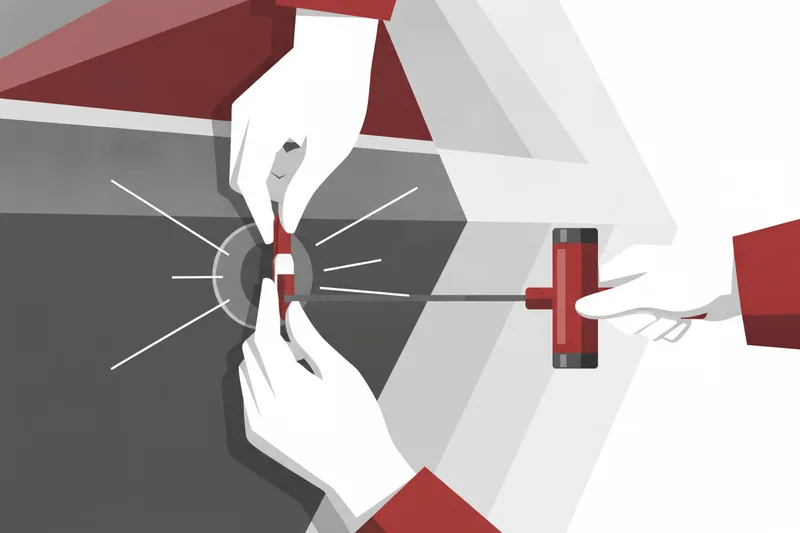
A cold glue dent puller is a tab-and-slide-hammer system: a reusable adhesive compound bonds a pulling tab to the outside of a dented panel, and a slide hammer or hand puller then pulls that tab — and the metal under it — back toward its original shape. It's one of several paintless dent repair (PDR) methods for working a panel from the outside. Whether it performs well on a given hail dent or crease comes down to three things: picking a glue rated for the temperature you're working in, prepping the panel so the bond actually holds, and running a clean pull that doesn't leave a pushmark — a secondary high spot or blemish from overworking the metal.
What a Cold Glue Dent Puller Is and How It Pulls a Dent
Cold glue pulling sits alongside hot glue pulling and backside pushing as one of PDR's core exterior methods. Instead of melting an adhesive with a glue gun, cold glue is a tacky, viscoelastic compound that works at room temperature, goes straight onto a tab, and is generally reused pull after pull as long as it stays clean and within the condition the manufacturer describes.
That reuse cycle is why cold glue shows up so heavily on hail jobs, where a technician may run dozens of pulls across one panel in a single sitting, sometimes combined with backside pushing or hot glue on the same repair. Shops carrying that kind of volume typically build their kit around a dedicated cold-glue platform — Glexo designs its systems specifically for that repeat-pull cycle — rather than treating cold glue as a backup to hot glue. Managing that volume as a whole job, not just as individual pulls, is its own workflow question worth planning separately.
Components of the system
A cold glue dent puller is really three components working together: the glue itself, a tab that carries it, and a pulling device — most often a slide hammer, an inertial pulling device that uses a sliding weight to deliver a controlled jolt of force, though a T-handle puller or a compact lever-operated mini lifter does the same job on smaller pulls. Sold together with assorted tab sizes, these make up a glue puller kit.
How the adhesive bond transfers pulling force
The tab's face holds the glue against the finish; the bond has to grip the paint firmly enough to transmit the pull without slipping sideways or peeling early. The pulling device then applies force through the tab into that bond, and from the bond into the panel underneath. Hot glue, the other common exterior method, builds its own strong adhesion and can generate substantial force on deep dents — which method to load isn't about one being categorically better, it's about matching the glue to the job and the conditions, which is where temperature comes in.
Cold Glue vs. Hot Glue, and Why Temperature Decides Your Pick
Neither method replaces the other across the board, and there's no fixed order for running one before the other — the repair plan decides, not a default sequence.
When cold glue is preferable
Cold glue earns its place on broad, shallow damage: large dents, heavy hail work, and damage crown manipulation, where you're moving a lot of metal over several pulls rather than chasing one sharp point. It also suits exterior pulling where you want to avoid a hot-melt bonding step entirely, and it combines with backside pushing on larger or more complex damage.
When hot glue is preferable
Where cold glue falls short is pinpoint accuracy on small, deep dents — it lacks the sharp pulling power hot glue delivers there. Hot glue's rock-solid adhesion and higher pulling force make it the better fit for stubborn, localized lows and fine detail work.
Temperature ranges and glue selection
Cold glue's performance is tied directly to temperature, cleanliness, and how it's been stored — it doesn't behave the same way in a cold shop as it does in a warm one. Hot glue isn't temperature-neutral either: manufacturers formulate hot glue sticks in separate hot- and cold-weather variants for the same reason. In practice that means picking a glue formulated for your current conditions, not just picking "cold" versus "hot" by name.
Technique matters alongside temperature too: a quick, hard pull generally wants a stiffer compound, while a slow, sustained pull suits a more elastic one. A common workflow runs cold glue first for broad initial movement and hot glue second for fine detail, but that's a sequencing choice built around the specific damage, not a rule every job follows.
Prepping the Surface and Avoiding Pushmarks in Your Conditions
Cleaning and prepping the panel
Adhesion fails before it fails at the tab — it fails on a dirty panel. Wax, sealants, ceramic coatings, and road film all act as separators that cut glue adhesion, so the finish needs a real chemical clean with an alcohol-based cleaner or a PDR-specific degreaser before any tab goes on, especially on older paint or a coated surface where that film is thicker than it looks. Whatever you use, keep it non-abrasive: sandpaper and matting sponges damage the clearcoat and defeat the point of staying paintless.
Common causes of pushmarks
Watch for the warning signs mid-pull: a high turning into a low, a visible mark appearing on the texture or paint, the crown expanding beyond the target area, or your light and reference no longer letting you localize contact accurately — any of those means stop and reassess. Check the result from more than one angle, and reposition your reference board before judging whether a pull actually worked. Pushmarks also come from reaching for glue when the job calls for something else: where backside access is open and safe, pushing is often the more direct, controllable route, and glue pulling earns its place specifically where that access is limited or blocked. If a panel offers no external pull point at all, that typically means turning to internal access tools, a separate category from glue pulling.
Outdoor and cold-weather adjustments
Panel and glue temperature both move with the weather, not just the air temperature on the forecast. A cold glue that's fine in a heated bay can lose tack working outdoors in winter, so budget more tack time and consider a cold-weather formulation rather than forcing a pull before the bond is actually set.
Applying Tabs and Pulling: The Correct Sequence
Before touching the panel, confirm compatibility across the chain that actually carries the pull: the finish with your cleaner, the glue with the tab, the tab with the panel material, the tab's neck with your adapter, and the adapter with the puller. A mismatch anywhere in that chain is usually where a pull fails.
- Select and prep the tab. Match tab size and shape to the size of the low and the panel's curvature, and confirm the tab's interface fits your puller's adapter. If a tab has been sitting near a release agent, clean it — residue there compromises the next bond.
- Place the glue and seat the tab. Apply the compound to the tab's contact face and center it over the low. A broader tab spreads load for bulk movement; a smaller one concentrates it for precision — the choice is driven by the dent in front of you, not a fixed large-to-small progression.
- Wait for tack. Give the glue time to grip the finish before loading it. How long that takes depends on the specific product and the ambient temperature, so judge by feel and the manufacturer's instructions rather than a fixed clock.
- Pull. Connect the slide hammer, T-handle puller, or mini lifter to the tab and apply controlled, incremental force. That load runs from the device through the adapter and tab, through the glue bond, into the finish, and into the panel — any weak point in that chain is where the pull slips instead of moving metal.
- Release and inspect. Pop the tab free and check the result under your light from several angles. Decide whether the area needs another pull, a smaller tab to clean up what's left, or is ready for knockdown and blending work.
On a typical hail low, that usually means a larger tab for the first pull to bring up the bulk of the depth, then a smaller tab seated on whatever shallow residual remains for a second, more targeted pull — no fixed pull count, just working the reflection until it reads flat.
Choosing Tabs, Glue, and a Kit for Your Shop
What to look for in tabs
A tab typically breaks down into a few functional parts: a contact face that carries the glue, a body that sets how stiff or flexible it is under load, a neck that carries that load, and an interface that mates to your adapter, though the exact breakdown can vary by tab design. None of that generates pull by itself — a tab is an external attachment, not a suction cup, so its entire value is in how cleanly it transmits force from your puller into the bond. Treat glue and tab as a paired decision: a given compound is formulated to work with certain tab materials and surfaces, so check that pairing rather than assuming any tab suits any glue.
What a complete kit should contain
Cold glue doesn't need a melt gun — it's commonly applied straight onto the tab — so a cold-glue kit's real cost center is tab variety and glue volume, not powered equipment. General panel work is usually covered by a handful of round and crease-shaped tabs in a couple of sizes. Hail-focused or high-volume shops need redundancy built in: more tabs in the sizes used most, extra glue on hand, and a mix of stiffnesses, so a worn or contaminated tab doesn't stall a job mid-panel.
FAQ: Cold Glue Dent Puller Questions Technicians Ask
How do I remove cold glue residue from paint? Use a release agent made to break that specific bond without affecting the finish — compatibility is product-specific, so match the release agent to the glue rather than defaulting to a generic solvent.
Can I reuse cold glue tabs? Yes, within limits. The compound is meant to be peeled off and reused pull after pull as long as it stays within the condition the product instructions describe. How many pulls you get out of one application varies with the tab's area, the pull rate and direction, and how worn the compound has gotten from previous cycles.
How long does cold glue last in storage? Shelf life is specific to the product and to how it's been stored, so go by the manufacturer's stated shelf life rather than judging by look alone.
When should I stop mid-pull? Stop if the finish starts to change, adhesion gets unpredictable, secondary damage shows up, the pull is moving too much surrounding metal or creating a new high, or the glue just isn't behaving the way the product instructions describe for the temperature you're working in.
If you're setting up a cold-glue process for your shop or scaling into higher hail volume, Glexo's cold glue dent puller systems and tabs are worth a look for matching a setup to your working conditions and repair volume.