PDR Glue Tabs: Choose Size, Shape & Glue
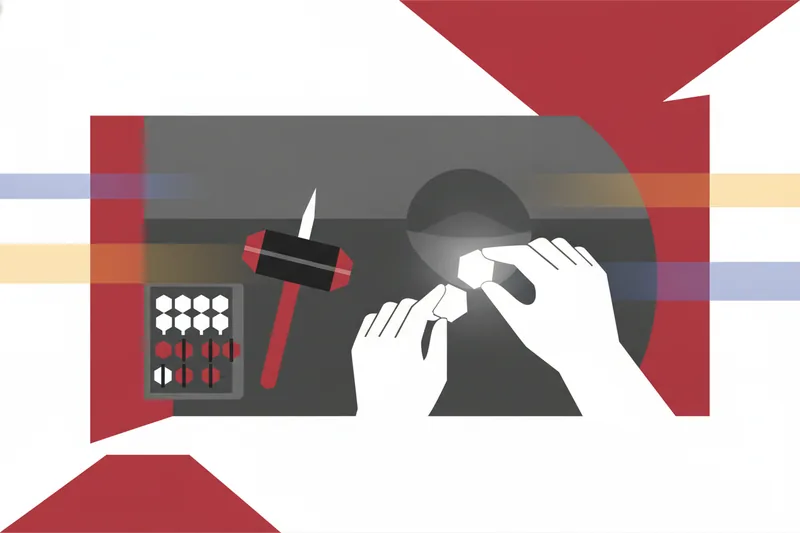
The right PDR glue tab is the one that matches three things at once: its shape and size to the dent you're pulling, its glue to the temperature you're working in, and the panel surface to a condition that will actually hold a bond. Holder and slide hammer compatibility matter, but they're a secondary filter — get the tab, dent, and glue match wrong and no holder fixes a failed pull. This guide works through those decisions in order: what a glue tab actually does, how to choose cold or hot glue for the conditions in your bay, why prep decides whether a tab holds, how to size and shape tabs for the dent in front of you, what to check for holder and slide hammer fit, and how those answers turn into a stocked kit.
What PDR Glue Tabs Are and How They Work
A glue tab is a shaped piece of plastic or metal — round, oval, or elongated — bonded to the painted surface so a pulling tool has something to grip. On its own, a tab does not pull anything: it is a temporary exterior attachment point, not a suction cup, and all the force that moves metal comes from whatever is connected to the other end of it.
The bond between tab and paint is made one of two ways. Hot glue pulling melts a PDR hot-melt glue stick through a glue gun and bonds the tab to the finish for a single pull cycle, then the tab is released and cleaned. Cold glue pulling uses a reusable tacky or viscoelastic compound pressed onto the tab face instead; the same lump of compound typically comes off the panel and goes back onto the next tab, as long as it's still in usable condition. Cold glue tack and handling vary by manufacturer, so technicians should test a new product before relying on it for a job.
Once bonded, the tab connects — directly or through an adapter — to a pulling device. A slide hammer is the most common: a weighted collar runs down a shaft and strikes a stop, and that impulse travels through the tab's neck into the panel. A dent lifter works on the same transfer principle through a lever or screw action instead of inertia. Blending hammers and knockdown tools come in later, during finishing, and are their own category.
Cold Glue vs. Hot Glue: Matching Adhesive to Working Temperature
Temperature is usually the first filter a shop applies when deciding what to load, because both glue families behave differently as the bay gets hotter or colder.
Hot glue sticks aren't one universal product — manufacturers sell separate formulations for warm and cold conditions, so a stick that sets fast and strong in a heated shop can behave quite differently in an unheated one. The color or brand on a stick says nothing about its temperature range by itself, and a gun temperature setting that works for one brand's stick doesn't transfer to another's.
Cold glue has the same sensitivity in the other direction. Because it's a tacky compound rather than a melted adhesive, its tack and stiffness shift with ambient temperature, cleanliness, and how it's been stored between jobs. Neither method is inherently better: cold glue and hot glue are different product and method options, and which one gets loaded depends on the damage, the finish, the temperature, and how the rest of the pull is set up. Many technicians run cold glue first to move broad metal fast, then switch to hot glue for the pinpoint work a deep or sharp dent needs.
When ambient heat changes glue set time
A shop running near 86°F (30°C) needs a glue formulated for that range; push past it with a cold-weather stick and set time drops before the pull is even positioned. Below that range, a warm-weather compound can stay too soft to transfer full force into the panel. Checking a product's stated working range before a job — rather than assuming last month's stick performs the same in a heatwave or a cold snap — is the simplest way to stop losing pulls to temperature.
Why Surface Prep Decides Whether a Tab Holds
A tab is only as good as the surface it's bonded to. Wax, ceramic coating, sealants, and plain road film all sit between the paint and the glue as a separator, which is why a chemical clean — isopropyl alcohol or a PDR-specific degreaser — comes before any tab goes on, not a wipe with a shop rag that just moves contamination around.
This matters more on older panels and on vehicles carrying a protective coating, where the surface has had more opportunity to build up residue the technician can't see by eye. A tab that looks seated can still fail mid-pull if the finish underneath wasn't actually clean. The same logic runs to the tab itself: a tab that's picked up release agent from a previous job can carry that residue into the next bond and compromise it, so tabs need their own cleaning pass, not just the panel.
Tab appearance doesn't indicate holding strength: two tabs that look alike from different makers can hold differently, so technicians should judge fit and prep quality instead of relying on how a tab looks.
Choosing Tab Shape and Size for the Dent You're Pulling
Shape and size decide more about pull quality than any other choice in the kit, because they set how load reaches the metal.
Crease tabs are the elongated family built to spread pull along a line rather than a point — the natural pick for a linear crease or a dent running along a bodyline. Round tabs concentrate pull on a single, well-defined low and suit isolated round dents, though a round footprint on the damage doesn't automatically mean a round tab is the right call — a round dent near an edge or feature line may pull better with a different shape, so the dent and the method should be named specifically rather than assumed. Oval tabs sit between the two, useful for lows that are elongated but not sharply linear.
Matching shape to dent geometry
Beyond the basic shape families, fitting a tab to a dent means reading panel curvature, how far load needs to transfer across the low, how stiff or flexible the tab body needs to be to follow that curvature, and which puller type — mini lifter, bridge puller, slide hammer, or hand puller — the tab's neck needs to interface with. A sharp, tight-radius dent raises the bar on all of this — it demands closer inspection, more precise localization, and a tab sized for gradual correction rather than one big pull. A broad, shallow low on a hood or roof is the opposite case, often pairing better with a beam or bridge puller and a tab sized to spread load across a wider area. A dent sitting on a double-panel section, such as a door over an intrusion beam, doesn't automatically qualify for glue pulling just because backside access is blocked — the finish and the geometry still have to work.
When to size up or down
There's no universal starting tab size, and no mandatory progression from large to small across a repair. The working logic is closer to this: size up when the goal is distributing force over a broader, shallower area, and size down when the goal is precise, localized control on a small or deep low. Treat each dent on its own geometry rather than defaulting to the tab that worked on the last job.
Glue Tab Holder and Slide Hammer Compatibility
A glue tab has four functional parts: the face that carries the adhesive, the body that sets how stiff or flexible it is, the neck that carries load away from the panel, and an interface that connects to an adapter or puller. That last part is where holder compatibility lives — the tab's neck has to physically match the adapter, and the adapter has to match the puller, before anything else about the tab matters.
In practice, a glue-pull setup has several points along the chain where compatibility needs checking, from the cleaner and adhesive through to the tab, the adapter, and the puller. Skipping any one of those is usually where a tab fails to seat or a pull fails to transfer.
Slide hammer weight is a separate decision from tab fit, and it deserves its own buying logic. Heavier slide hammers have a documented role in hail and roughing work, where the job is moving a lot of metal quickly, while lighter or smaller slide hammers suit more precise pulls — the category shouldn't be tied to one damage size across the board. A T-handle puller can look similar to a T-handle push rod, but the two aren't interchangeable just because the grip shape matches; the load path and interface differ.
Cold glue systems simplify one part of this: there's no separate glue gun or heat gun required, since the compound is pressed directly onto a compatible tab. That removes one check from the list, but the tab-to-adapter-to-puller chain still needs confirming.
From Choosing a Tab to Pulling: Deciding What to Stock
Once shape, size, and glue are matched to the dent, the pull itself follows a short logic: clean and inspect the panel, bond the tab to the prepared surface with the temperature-correct glue, let it set per the product's instructions, then connect the compatible puller and apply controlled force while reading the panel's reflection. Load runs in a fixed order — from the puller, through the adapter and tab, through the glue, into the finish, and finally into the panel — which is why a weak link anywhere in that chain, not just a wrong tab, is usually what causes a failed pull. A full pull-by-pull sequence for a hail job is its own, longer topic; this guide stops at the fit and the kit.
Picking the pulling device before assessing the damage, the finish, and the access around it is a common error worth avoiding — the device should follow from those three factors, not the other way around. For a controlled, localized lever pull, a mini lifter fits; for a sustained pull with support around the repair area, a bridge or beam puller does, with beam pullers able to span wider damage and carry multiple tabs or feet at once; for a fast impulse pull, a slide hammer; for a manual, aligned pull, a T-handle puller.
Building a working kit by category
A working kit built around this logic covers five categories rather than one favorite tab: an assortment of crease, round, and oval tabs across a few sizes; a glue tab holder or adapter matched to the puller already in the toolbox; cold glue and hot glue sticks covering the shop's actual working temperature range; a chemical surface-prep product for degreasing before every tab goes on; and a release agent for getting tabs and glue off cleanly between jobs. Stocking by category, rather than by a single favorite tab, is what keeps a hail job or a run of back-to-back pulls from stalling because the one tab that fits isn't in the case.
For shops covering a range of working temperatures, a cold-glue system that includes metal tabs for general repairs alongside a hail kit variant lets the same base method scale from single-panel jobs to full hail roofs without switching adhesive chemistry mid-job. Pairing that with SPS surface-preparation wipes addresses the prep step directly at the bench, so cleaning the panel doesn't depend on whatever solvent happens to be on hand that day.
FAQs About PDR Glue Tabs
Can PDR glue tabs be reused? Cold-glue tabs generally can, since the compound is designed to be pulled off the panel and reapplied as long as it's still clean and in good condition. Hot-glue tabs are typically cleaned of melted residue and reused as tabs, even though the glue itself is a single-use application.
Does removing a tab damage the paint? Not when it's done correctly. Cold glue is designed to release from the panel without leaving residue behind, and hot glue is removed with a compatible release agent rather than by force, which is what protects the finish underneath.
Matching tab, glue, and prep to the dent in front of you is what keeps a pull predictable, job after job, whether it's one panel or a full hail roof. Explore Glexo's cold-glue tab systems and surface-prep wipes to build a kit matched to your working conditions.